Cyotek Spriter Help
In this first tutorial, we'll cover creating a new project, adding images to it and modifying the layout, then finally saving the project.
Creating the new project
- Select New from the File menu, or press Control+N
- An empty project will be created with everything set to default values
Adding images
- There are numerous ways to add images to a project, but for now we'll stick with the simplest. From the Project menu, select Add Images, or press Control+I
- When the file dialog appears, navigate to the samples folder of your Spriter installation (typically C:\Users\<username>\AppData\local\cyotek\ spriter \sample or C:\Documents and Settings\<username>\Application Data\cyotek\ spriter ), and select all images in that folder.
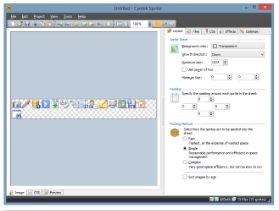
You should now have something approximating the image below:
Applying padding
- Most settings can be left at default values. However, if you want to add padding around the sprites, try changing the values in the Padding group.
Choosing a packing method
- Spriter also allows you to a choose a packing method, which determines how the sprites are laid out in the output sprite sheet. Try changing to Complex to see how the layout changes. Which method you use depends on your project size and how you like the graphics positioned.

Saving the new project
- Select Save from the File menu, or press Control+S
- Enter a file name for your project and click Save